
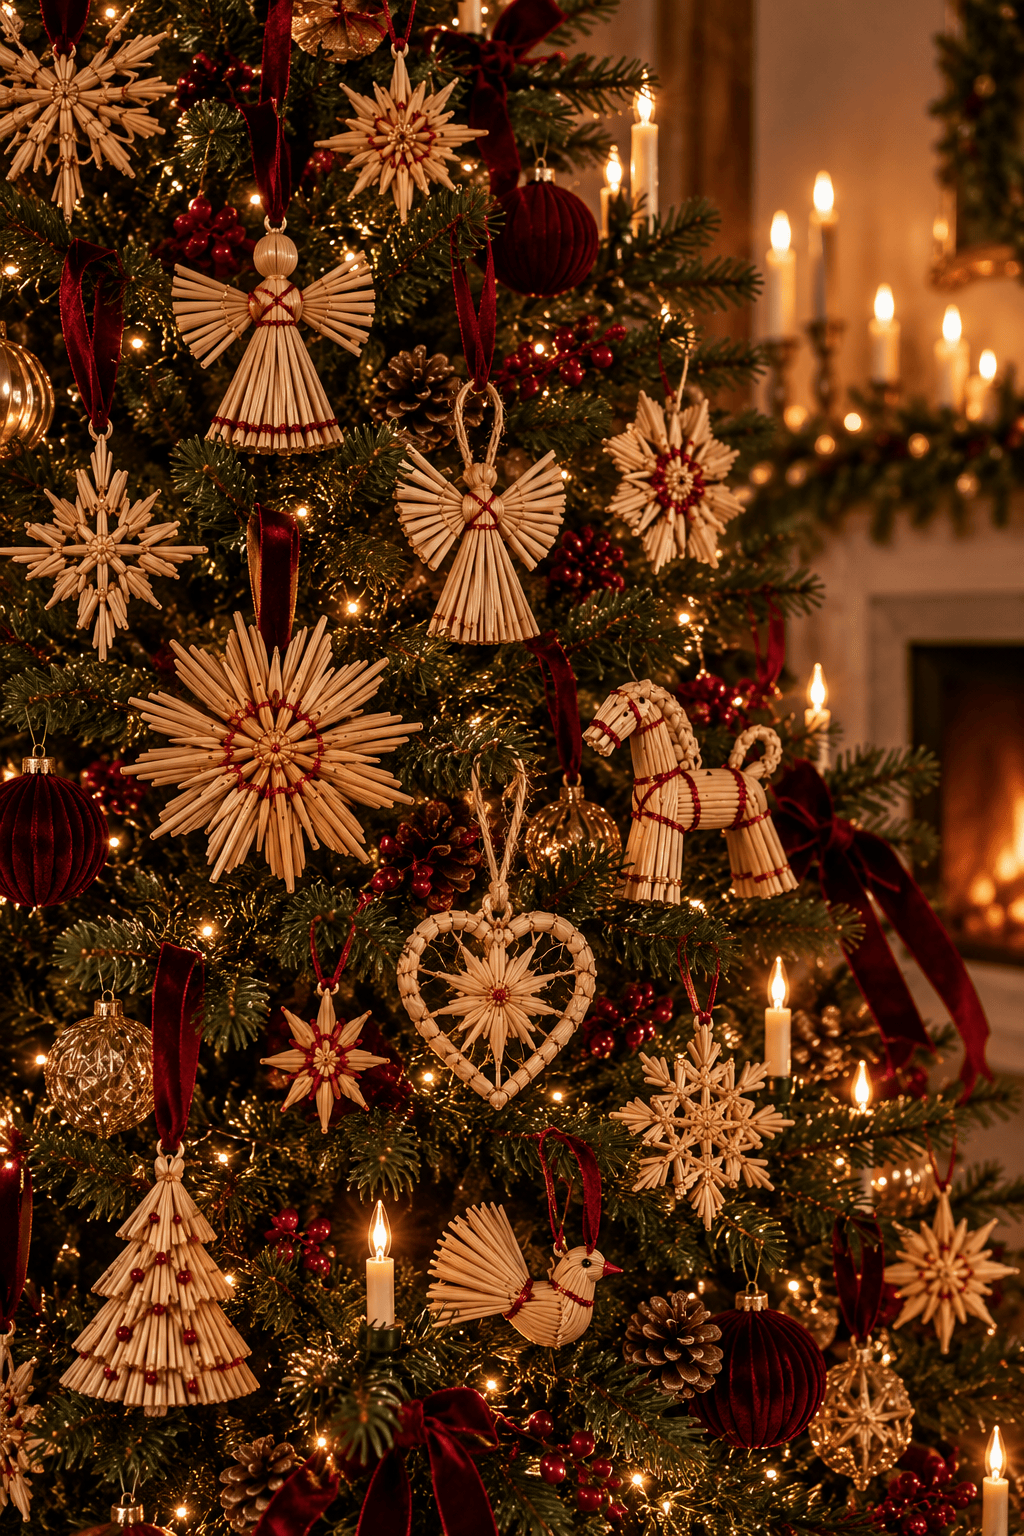
The old-world Christmas DIY I want to try this year.
There is something about traditional straw Christmas ornaments that feels instantly nostalgic.
Natural straw, little red threads, evergreen branches, candlelight — they have that wonderfully simple, old-world Christmas feeling that doesn’t need much decoration around it.
And while you can absolutely buy ready-made straw ornaments, there is something special about making a few yourself.
So this year, we’re bringing the tradition back — with a PrettyThingsClub twist.
Natural materials, beautiful shapes and a Christmas palette that feels collected rather than overly decorated.
Why Straw Ornaments Feel So Special
Straw ornaments have a long history in European Christmas decorating, particularly in Germany and Scandinavia. Traditional versions range from simple stars to much more intricate designs, including angels and other festive figures.
The beauty is in the material itself.
You don’t need glitter, plastic or a huge collection of supplies.
Just straw, thread, scissors and a little patience can create something beautiful.
And once you start, the possibilities go far beyond the classic star.
⭐ 01. The Traditional Straw Star
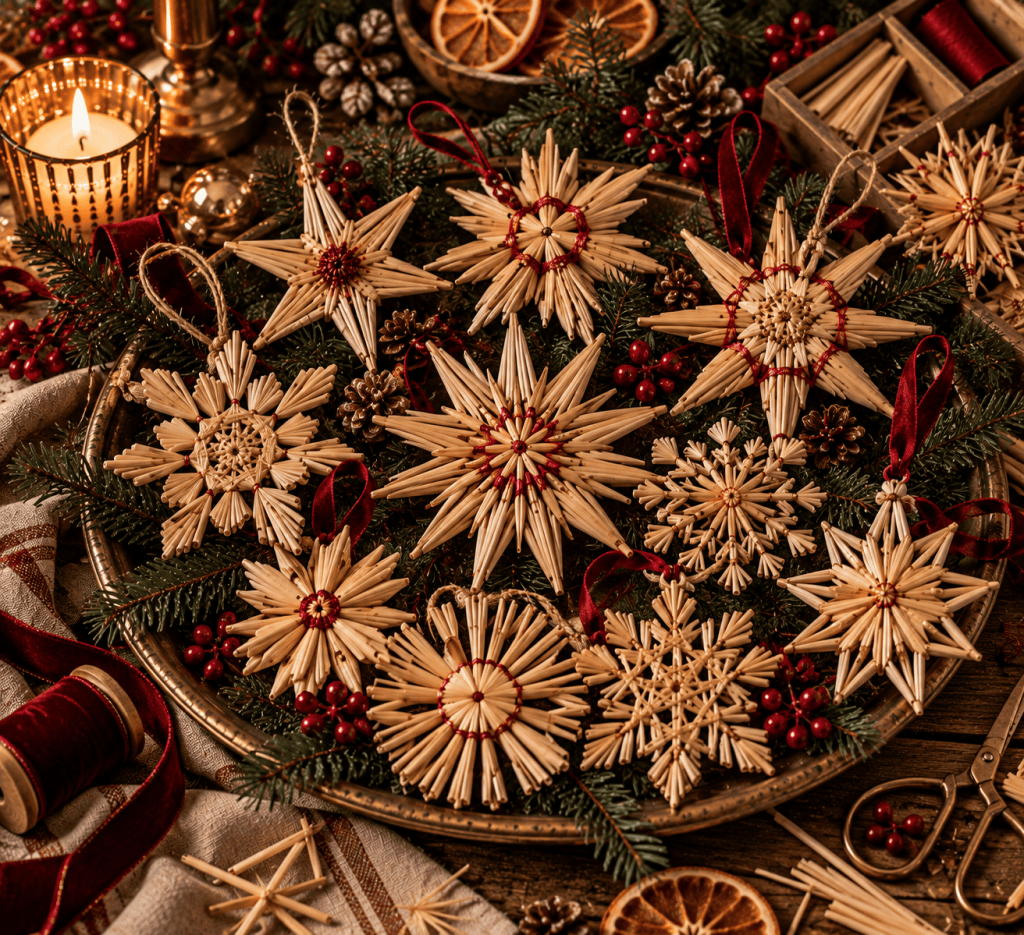
The classic.
A simple straw star is probably the easiest place to start, and it immediately gives a Christmas tree that beautiful natural, handmade feeling.
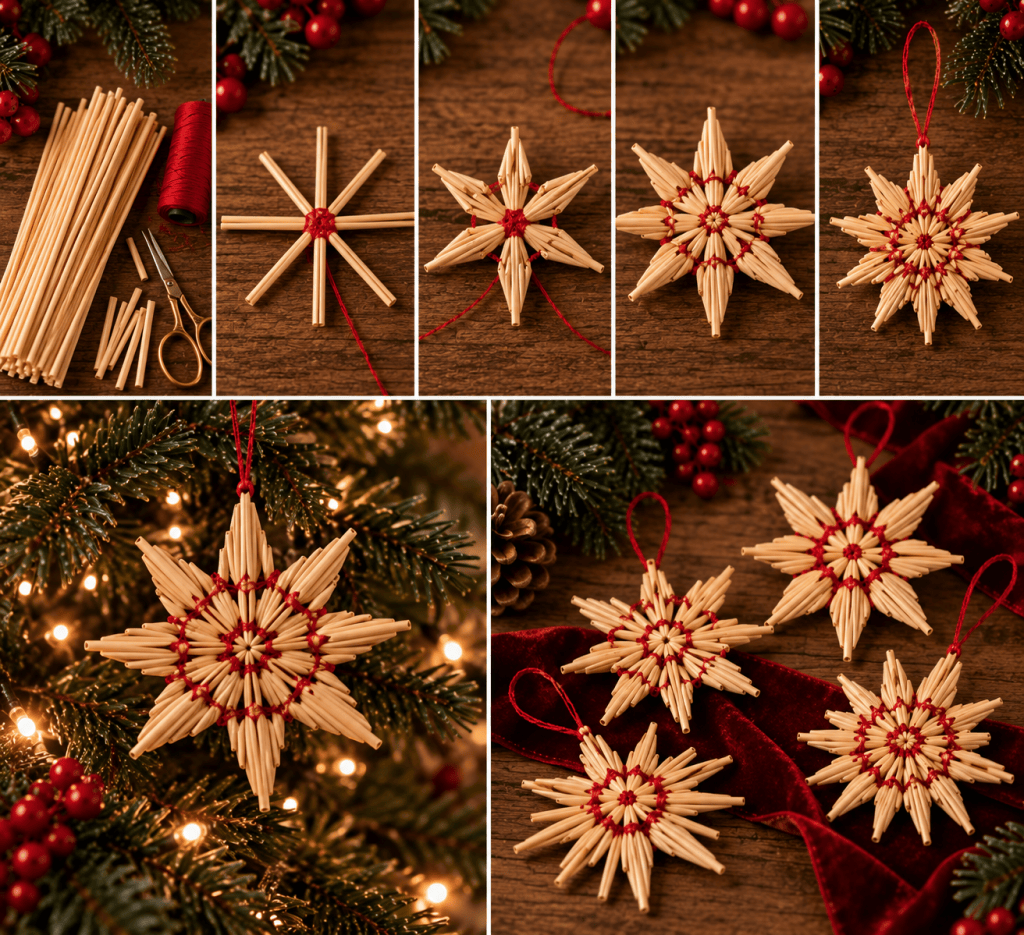
Traditional methods vary, but the basic idea is simple: soften and prepare the straw, arrange the pieces into a symmetrical star, secure the centre with thread, and trim the ends into points. Some methods use a small jig to keep everything perfectly aligned, while simpler versions can be assembled by hand.
What you’ll need
- Natural craft straw
- Strong thread or embroidery thread
- Small scissors
- A sharp craft knife or blade for more precise trimming
- Warm water for softening the straw
If you’re using natural straw that needs flattening, soaking it briefly in warm water makes it more workable. Some traditional methods then flatten the straw with an iron.
The simple process
1. Prepare the straw.
Soften and flatten the pieces if necessary, then cut them to similar lengths.
2. Build the star.
Arrange the pieces evenly around the centre, creating the star shape.
3. Bind the centre.
Wrap strong thread around the middle, alternating over and under the straw pieces and keeping the tension even.
4. Shape the points.
Trim the ends into points or another decorative shape.
5. Add the hanging loop.
Use the remaining thread to create a simple loop.
And that’s your first straw ornament.
For a more traditional star, you can layer additional straw pieces to create a fuller, more intricate design.
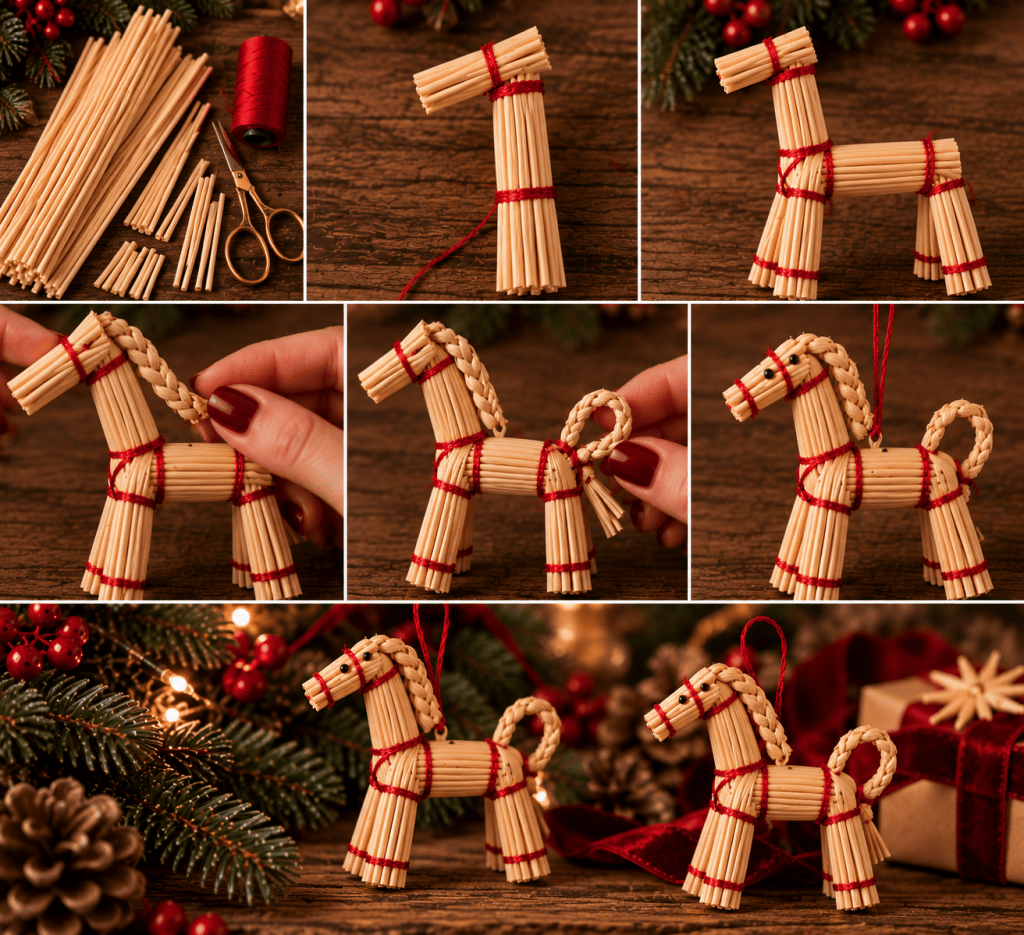
🐴 02. Little Straw Animals
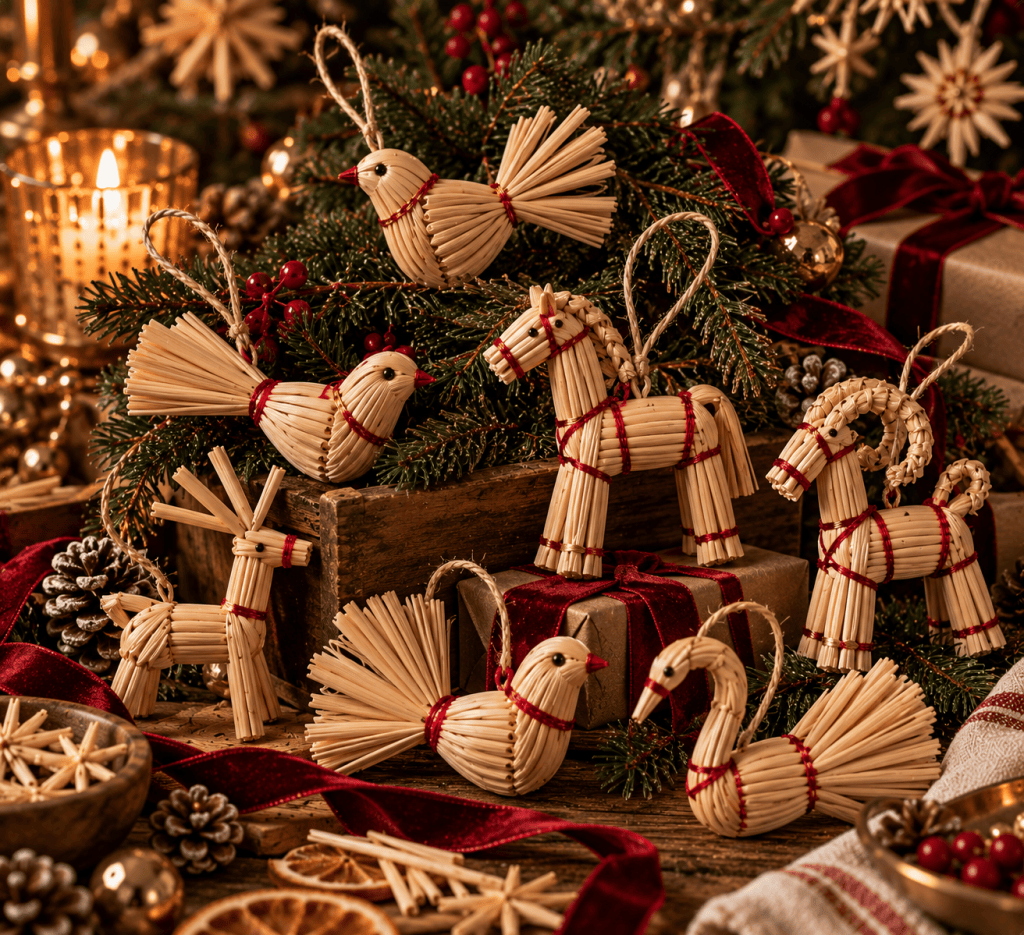
This is where the craft becomes especially charming.
Once you move beyond stars, straw can be shaped into little festive figures such as horses, birds and other traditional-inspired ornaments.
The construction is more involved than the simple star, so I wouldn’t worry about following a complicated pattern perfectly.
Think of the process as building the figure from small bundles of straw and securing each section with thread.
The basic idea
Build → bind → shape → braid → finish.
For a little horse, for example, you can create separate straw bundles for the body and legs, secure them together with thread, then add braided straw for the mane and tail.
A small bead or dark thread can become the eye, while a simple hanging loop turns the figure into an ornament.
The beauty is that they don’t have to be perfectly identical.
In fact, I think they’re prettier when they aren’t.
🐦 03. Straw Birds
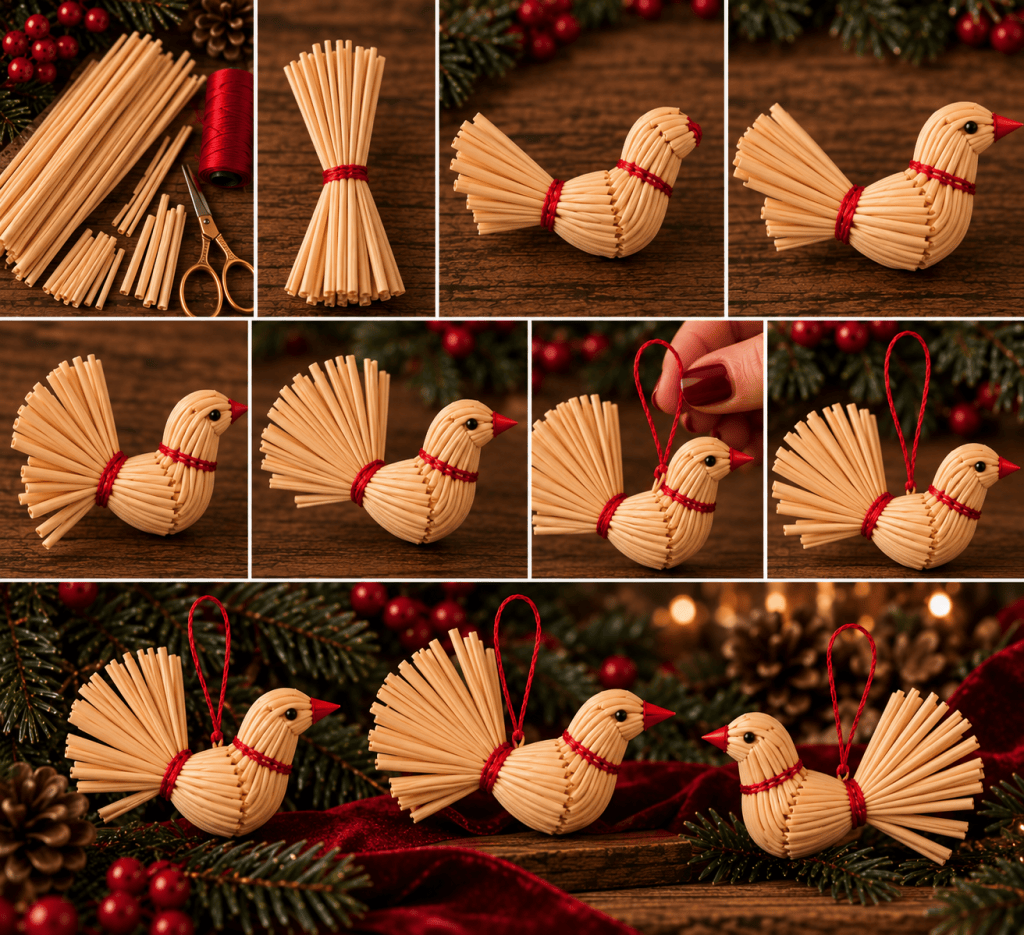
The little birds might be my favourite.
They’re wonderfully simple-looking once finished, but the shape comes from layering and binding small bundles of straw.
Start with the body, then build up the head and fan-shaped tail. Secure the sections with thread and add a small loop for hanging.
A tiny contrasting thread detail can give the bird a little personality without taking away from the natural straw.
Natural straw + red thread = instant Christmas charm.
👼 04. Straw Angels
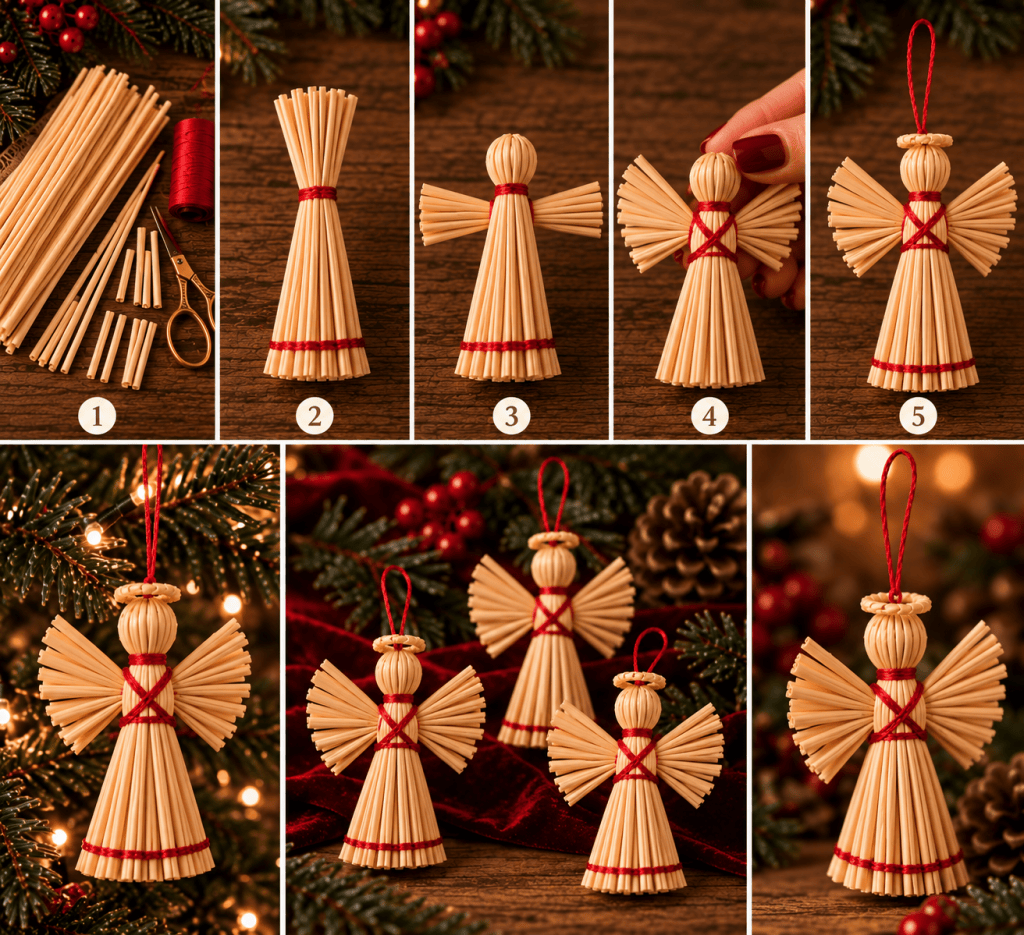
Straw angels are another beautiful variation.
The basic silhouette can be created from a bundle of straw for the body, with additional straw arranged into wings and a small rounded head.
Secure the body with thread, add the wings, then finish with a simple hanging loop.
For a traditional look, keep the straw natural and use red thread.
For something slightly more refined, try:
natural straw + cream thread + tiny gold details
The result is delicate enough to hang from a tree, a garland or even a Christmas branch arrangement.
❤️ 05. Straw Hearts
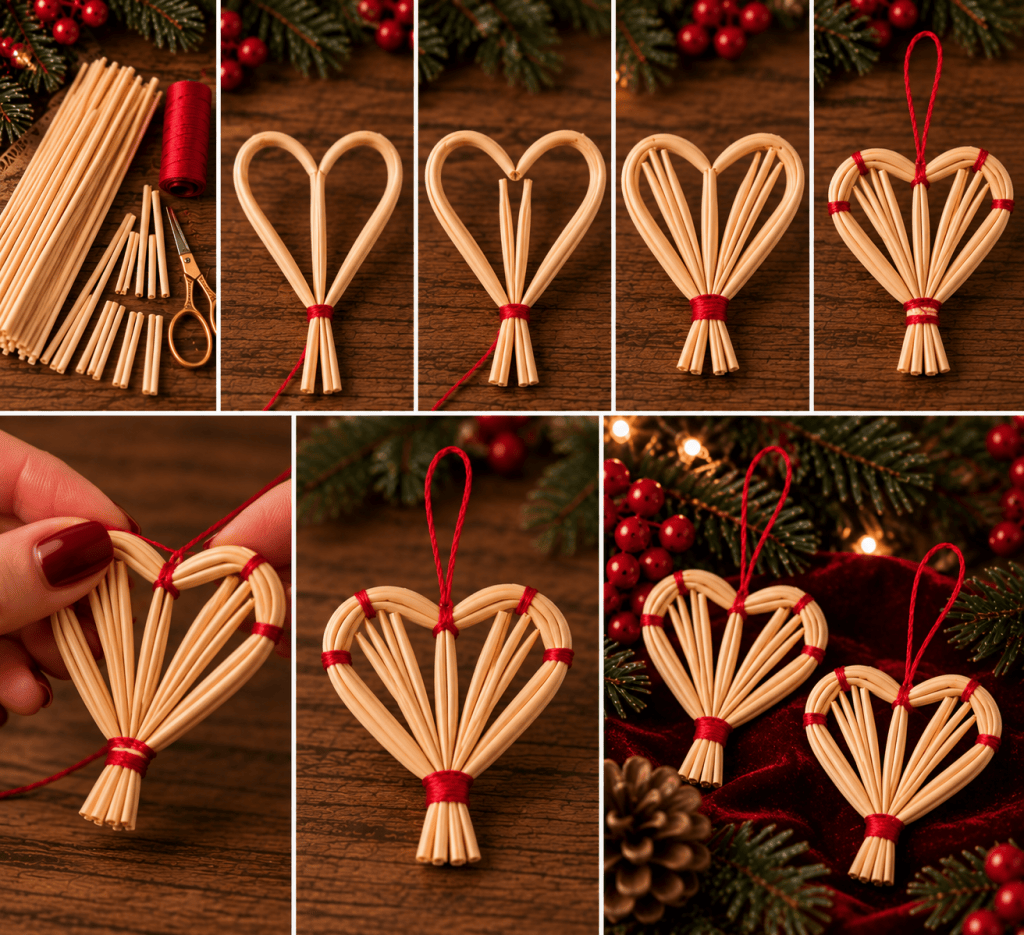
And then there are the hearts.
These are especially lovely if you want something that feels a little more romantic and Scandinavian-inspired.
A simple heart can be formed from curved straw pieces, then filled with smaller strands arranged toward the centre and secured with thread.
Add a hanging loop and you’re finished.
They also make beautiful gift toppers, especially when paired with kraft paper, linen ribbon and a little evergreen sprig.
🎁 Use Them as Gift Toppers
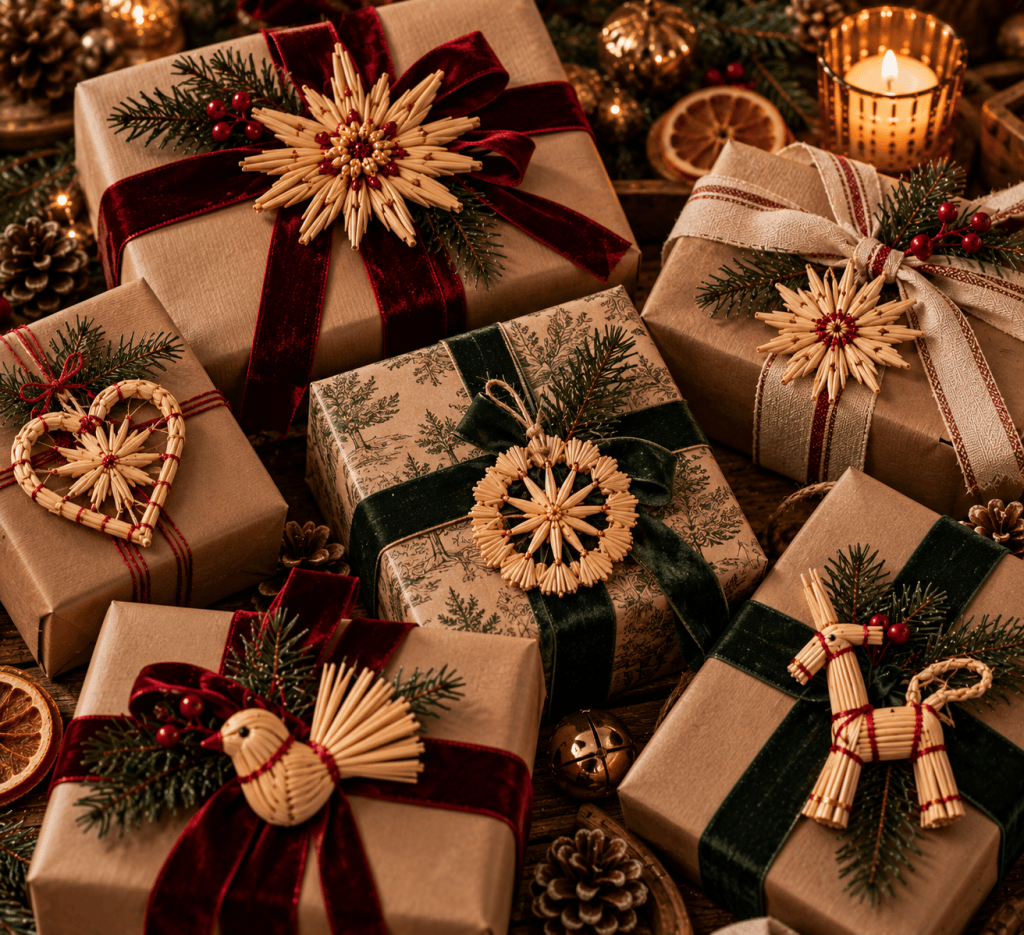
You don’t have to put every straw ornament on the Christmas tree.
One of my favourite ideas is to use them as part of your gift wrapping.
Try:
kraft paper + burgundy velvet ribbon + straw star
or
cream paper + forest green ribbon + straw bird
or
brown paper + natural twine + straw heart + evergreen sprig
Suddenly, even a very simple present feels beautifully considered.
And the ornament can become part of the gift.
🤎 How to Make Straw Ornaments Feel More Luxurious
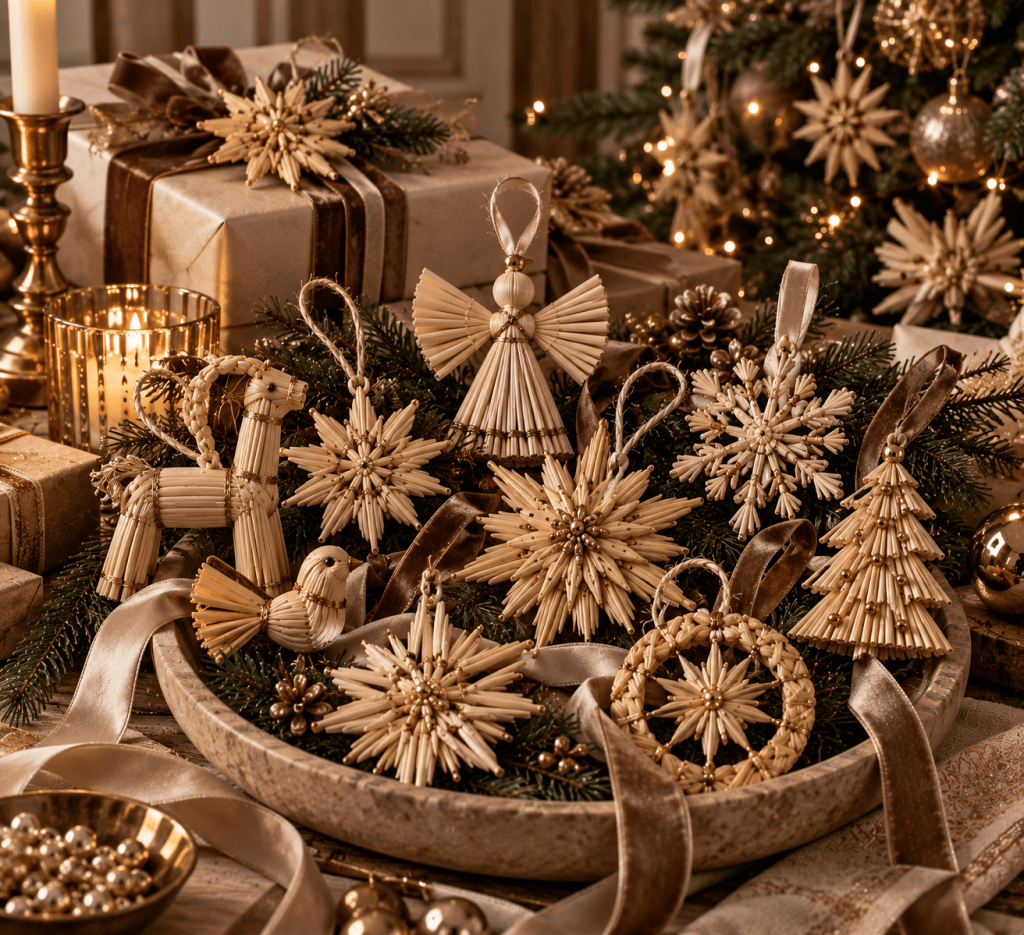
This is where I would give the traditional craft a little PrettyThingsClub styling.
You don’t need to change the straw itself.
Instead, change what you put around it.
Traditional
Natural straw
Red thread
Evergreen Picks
Berry Picks
Dark Wood
Red acrylic beads
Neutral Luxury
Natural straw
Champagne ribbon
Taupe velvet ribbon
Antique gold paint
Cream Linen
Scandinavian Soft
Natural straw
Ivory ribbon
Pale wood
Sage greenery
Soft candlelight
Heritage Christmas
Natural straw
Burgundy velvet
Forest green
Plaid
Brass accents
The same handmade ornament can look completely different depending on how you style it.
The Beauty of Making Less
I don’t think you need an entire tree covered in handmade straw ornaments.
Sometimes a handful is enough.
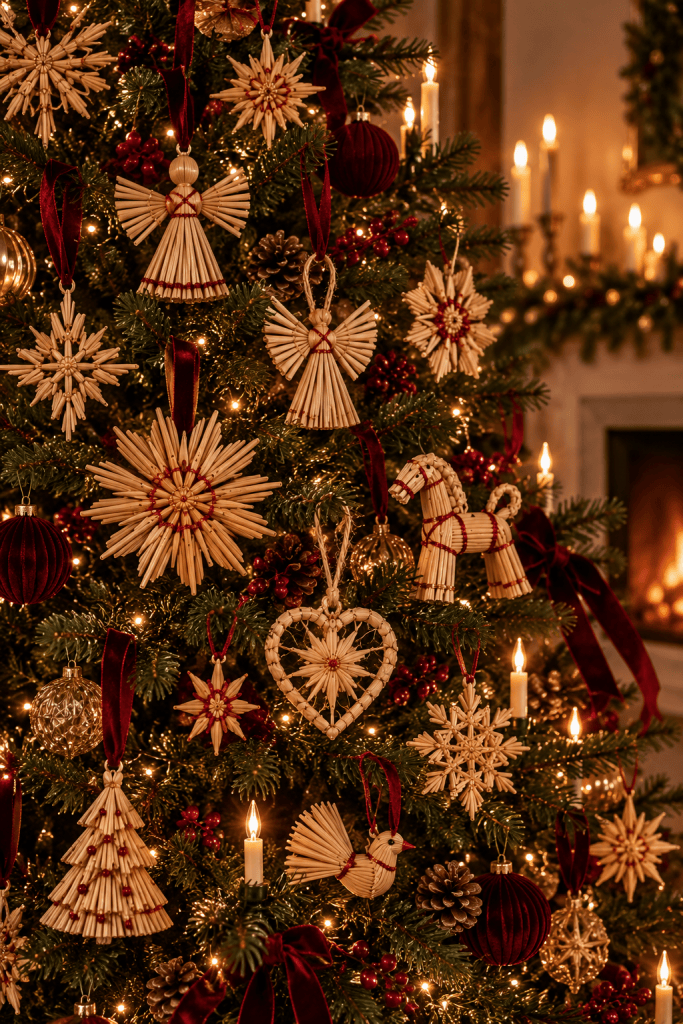
Hang a few stars among your regular ornaments.
Add one little horse to a Christmas wreath.
Tie a straw heart onto a present.
Put three tiny birds on a branch.
Let the natural straw become one of the quiet details that makes the whole room feel more thoughtful.
That’s what I love about this kind of Christmas decorating.
It doesn’t have to shout.
It just feels special.
Why buy another box of ornaments when you could make a few you’ll actually want to keep?
A Little Old-World Christmas
Maybe that’s what makes traditional straw ornaments so appealing.
They’re simple.
They’re tactile.
They use a natural material.
And they carry that feeling of Christmas crafts being something you actually made, rather than simply something you bought.
So this year, instead of filling another shopping basket with decorations, maybe make a few instead.
A little straw. A little thread. A little time.
And suddenly, your Christmas tree has something that nobody else bought for you.
Some links in this post may be affiliate links, which means PrettyThingsClub may earn a commission at no extra cost to you.


